Trial
Setup of the trial
Great that you have decided to start a trial! There are a couple of steps to go through to experience all that DAQS has to offer.
- Contact DAQS and provide the following information:
- Company name.
- A list of trial users:
- User first name and last name.
- User email address.
- License type (Dashboard user or DAQS Assist user).
Info
A person that is responsible for a project typically get a Dashboard license. A Revit modeller typically get a DAQS Assist license.
- Each user will receive an email from
noreply@daqs.ioasking them to confirm their account and set a password.
Revit setup
System requirements
- If the computer can run Revit, then it can run the DAQS Assist Revit plugin.
- Internet connection is required.
- The DAQS Assist uses HTTPS port 443. This is the standard port for secure web traffic, enabling encrypted communication.
- DAQS Assist download{:target="_blank"}
- DAQS Assist installation instructions{:target="_blank"}
BIM360 / Autodesk Construction Cloud setup
To ensure the DAQS service functions correctly, you'll need to install a plugin on your Autodesk hub. Since companies often use different Autodesk hubs for various purposes, it's essential to choose the correct hub where your projects for the DAQS trial are stored. Please make sure to follow the steps below on the specific hub you want DAQS to operate from.
Follow the video instruction or the step by step instruction.
Video Instructions
Step by Step Instructions
-
Log in to your Autodesk Construction Account with Admin credentials:
- Europe: Autodesk Construction Cloud Europe{:target="_blank"}
- Americas: Autodesk Construction Cloud Americas{:target="_blank"}
-
Go to Account admin.
- Go to BIM360 admin.
- Go to Settings.
- Go to Custom Integrations.
- Click on Add Custom Integration.
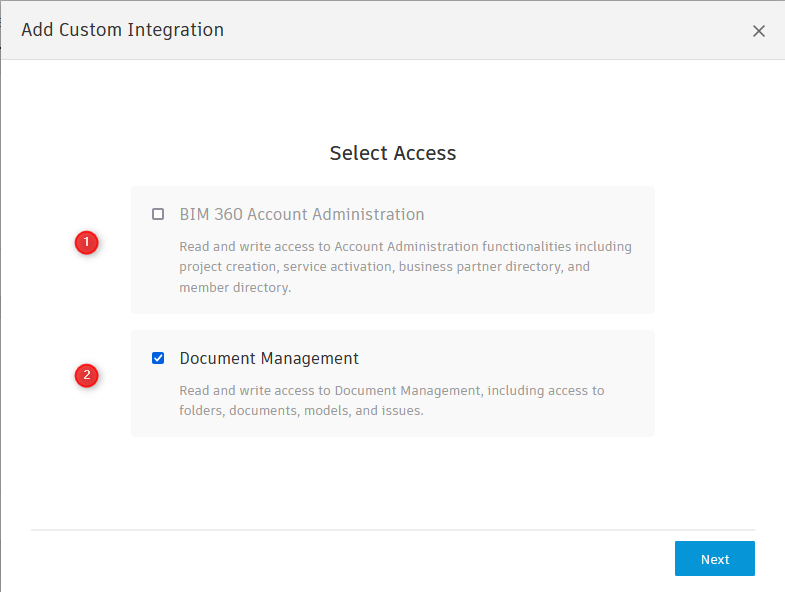
- Be sure to uncheck BIM360 Account Administration.
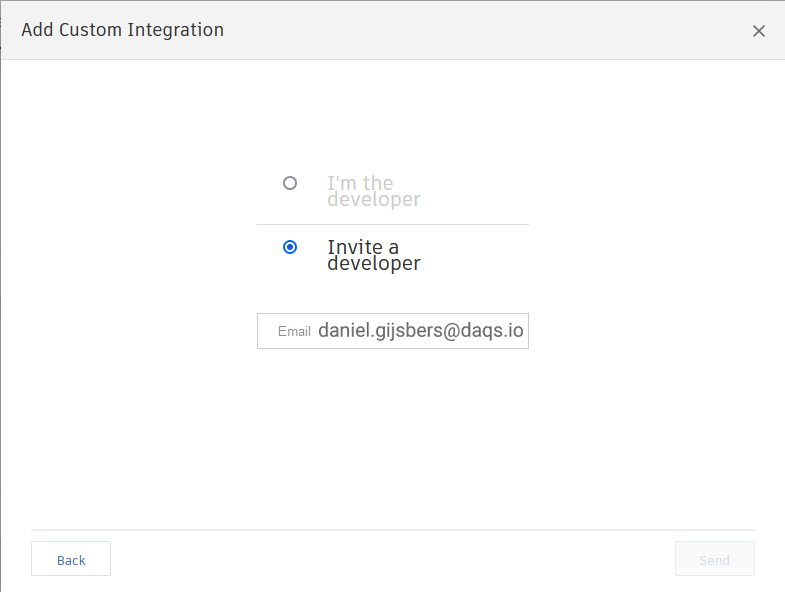
- Use this email address in the image above.
- DAQS will receive an email from Autodesk asking to install the plugin on you CDE and you should see something similar to this.
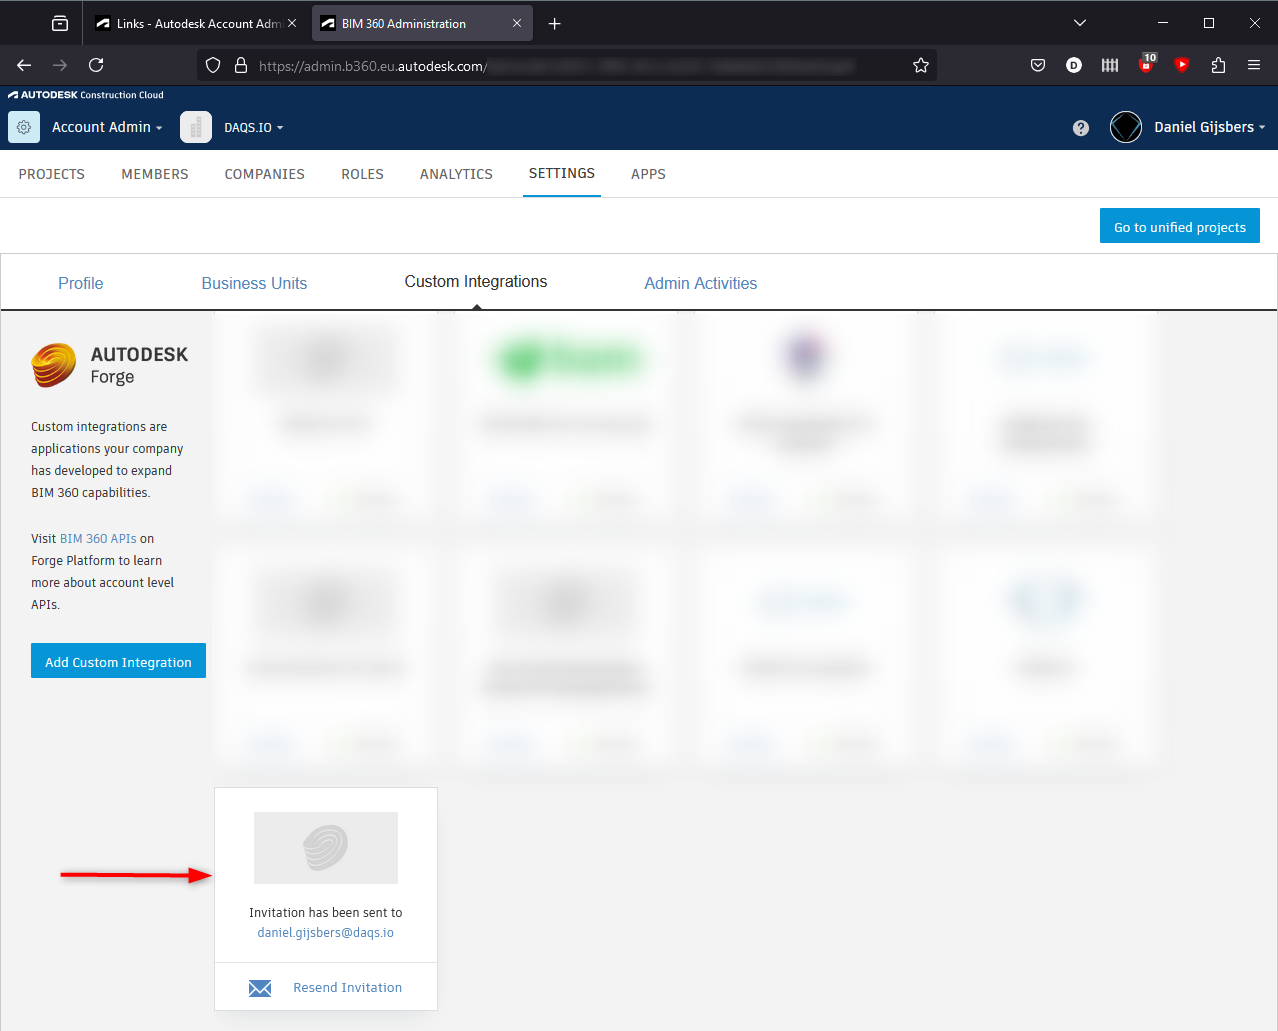
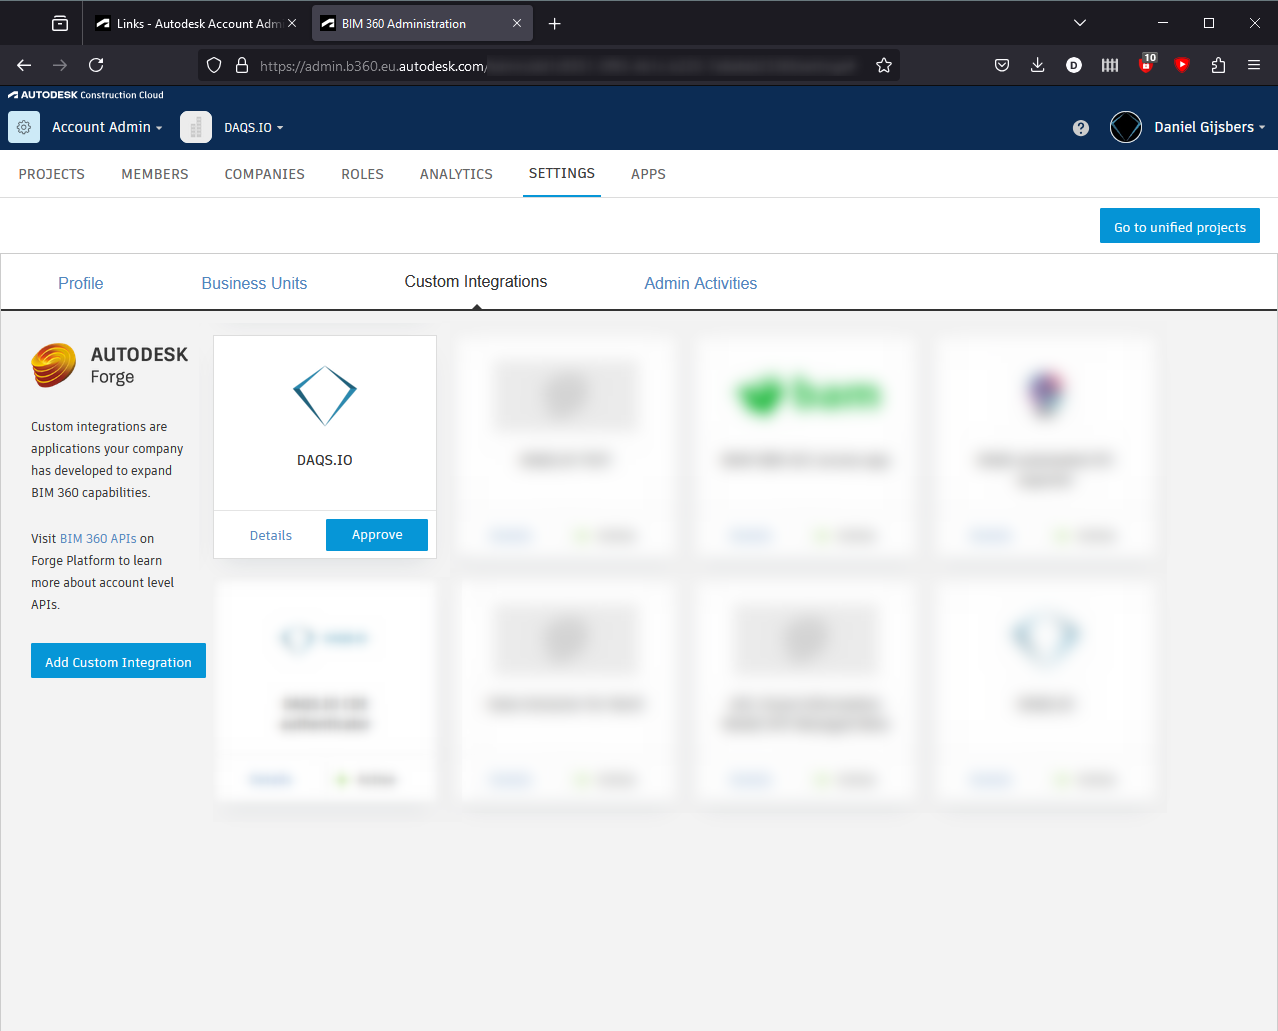
- Remember this place, after DAQS installs the plugin you will need to authorise the plugin by clicking on approve.
- Log on the DAQS Dashboard.
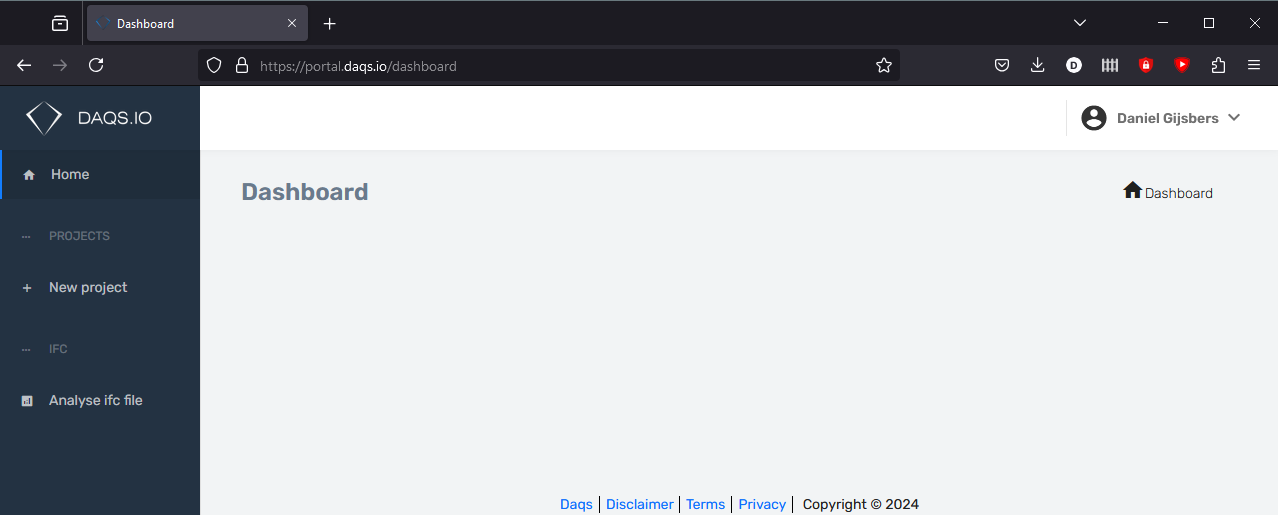
- Go to New Project.
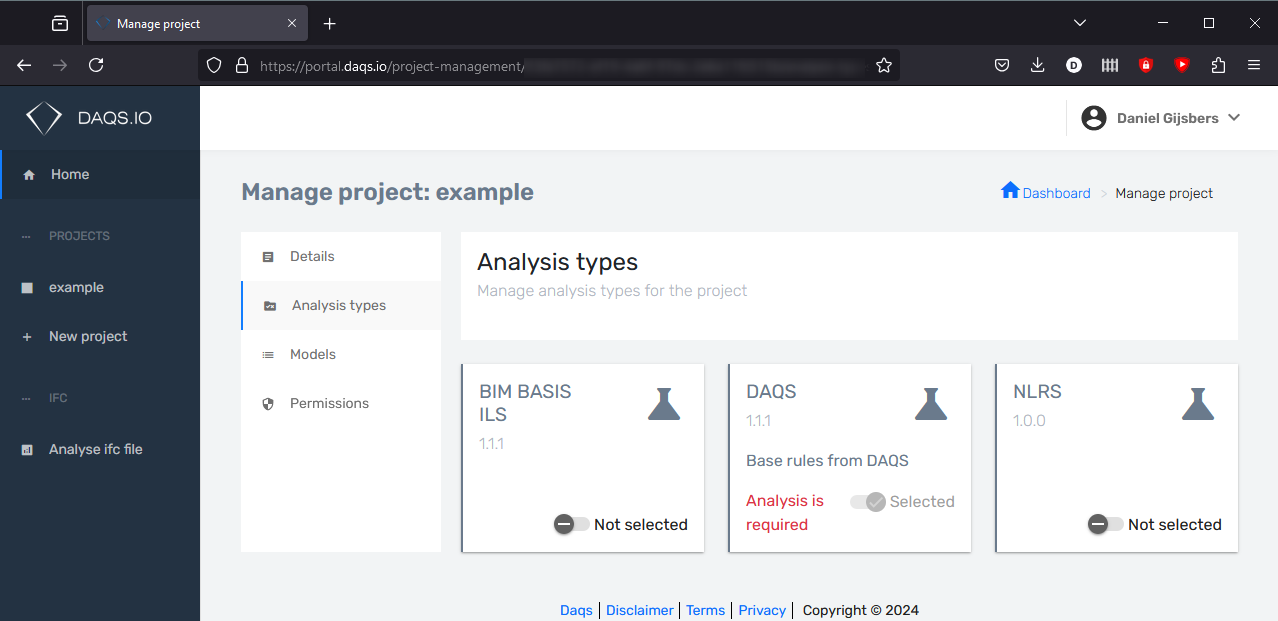
- Fill in the forms and submit.
- Click on Analysis Types and turn on the required ones.
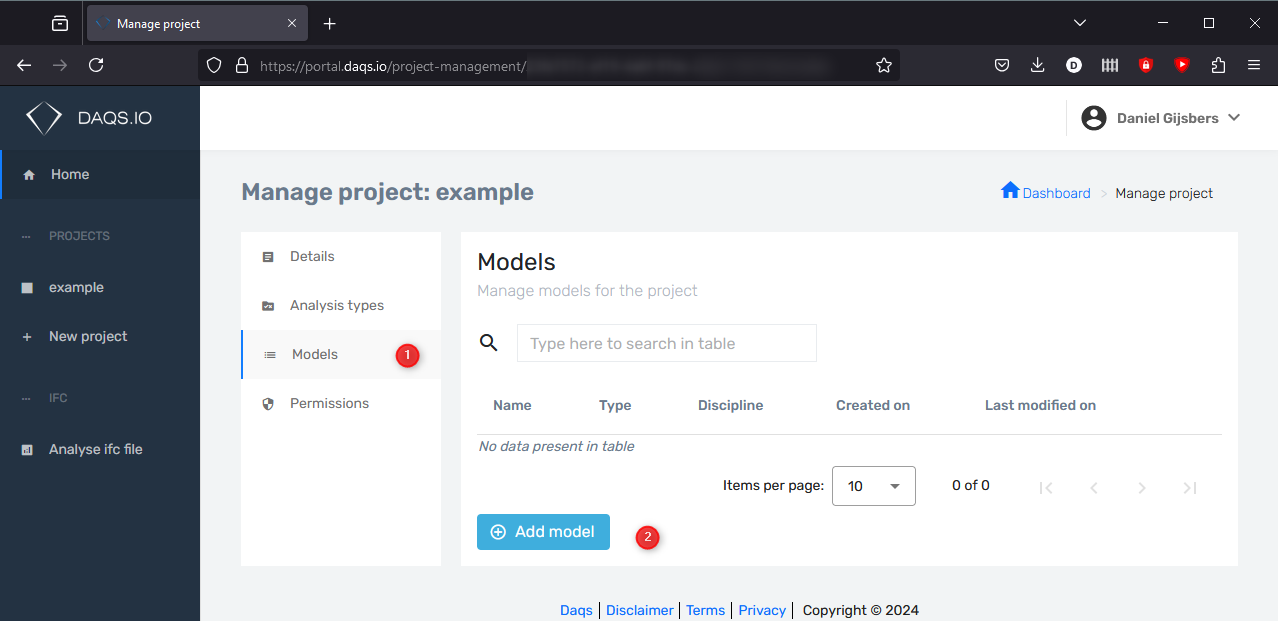
- Click on Models --> Add model.
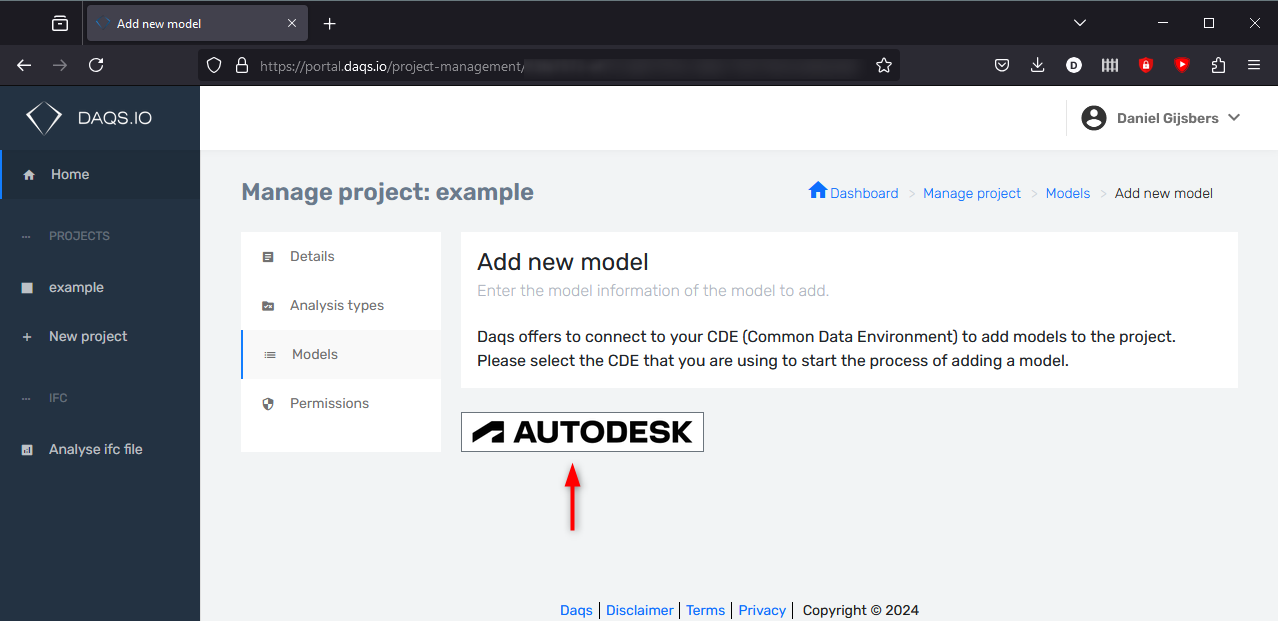
- Click on Autodesk.
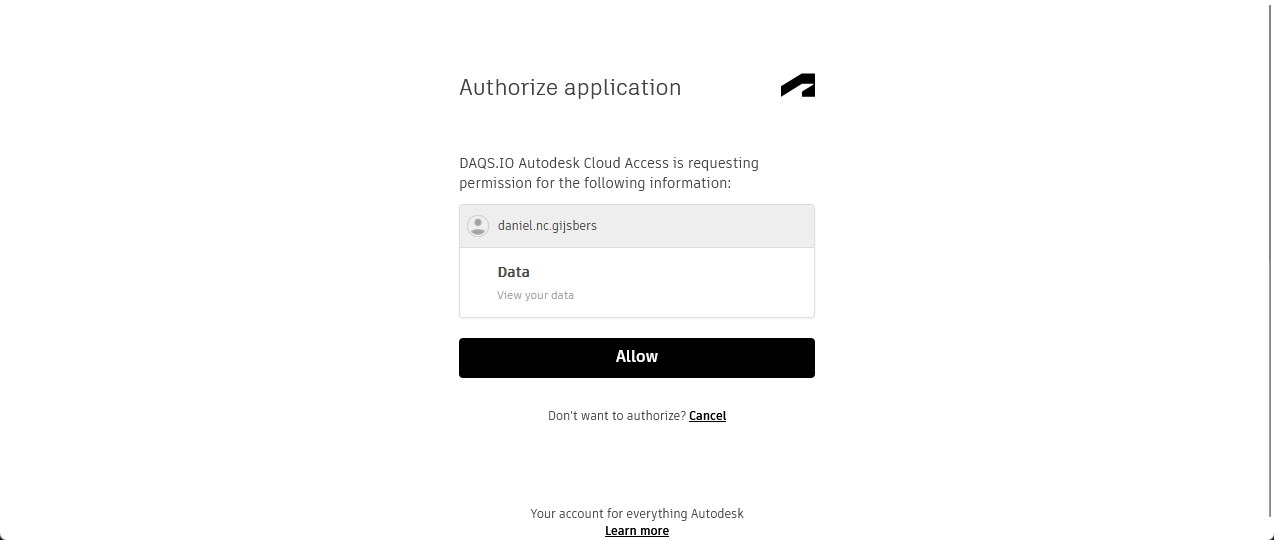
- Log in with your Autodesk credentials. Important to understand: We, DAQS, do not get your credentials. DAQS gets a hash from Autodesk to let you perform actions from the DAQS dashboard. DAQS follows Autodesk's instructions and requirements regarding security. Please read more about this here: Autodesk credentials Security{:target="_blank"}
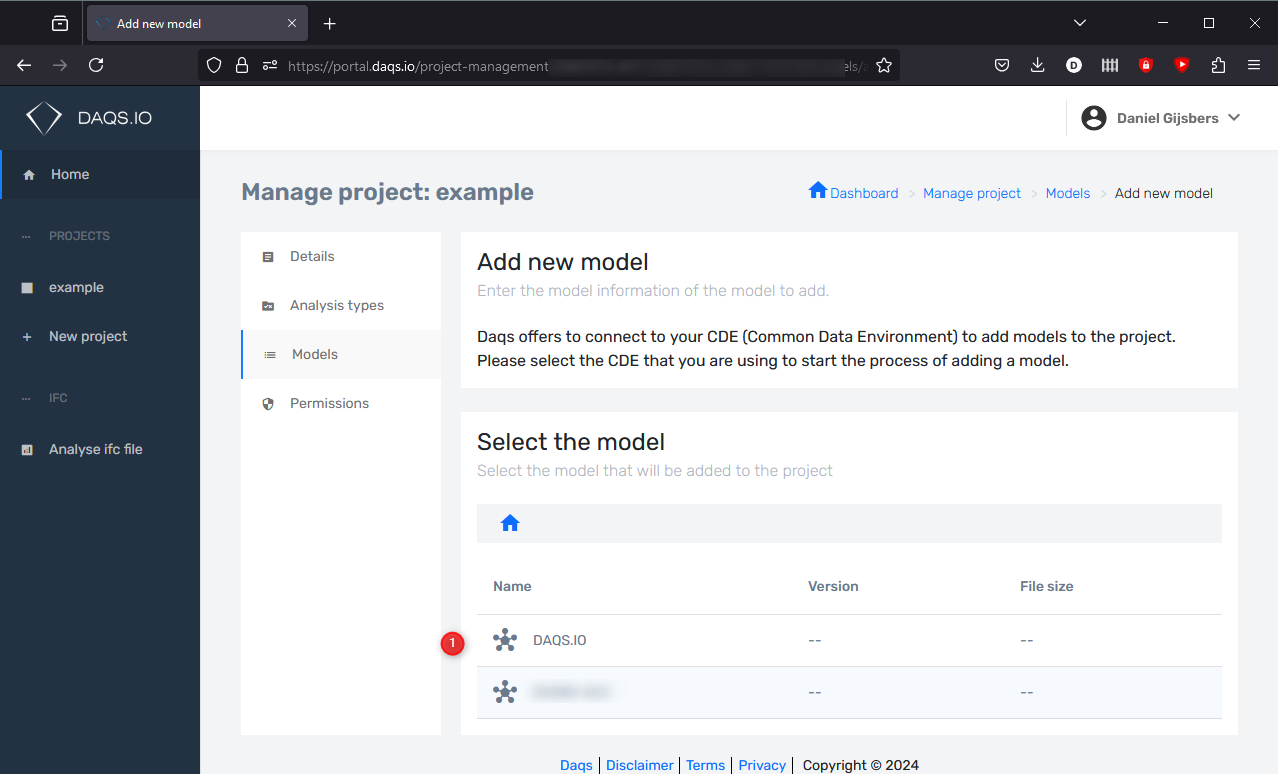
- Select the correct hub. What you see here depends on which hubs you have access to.
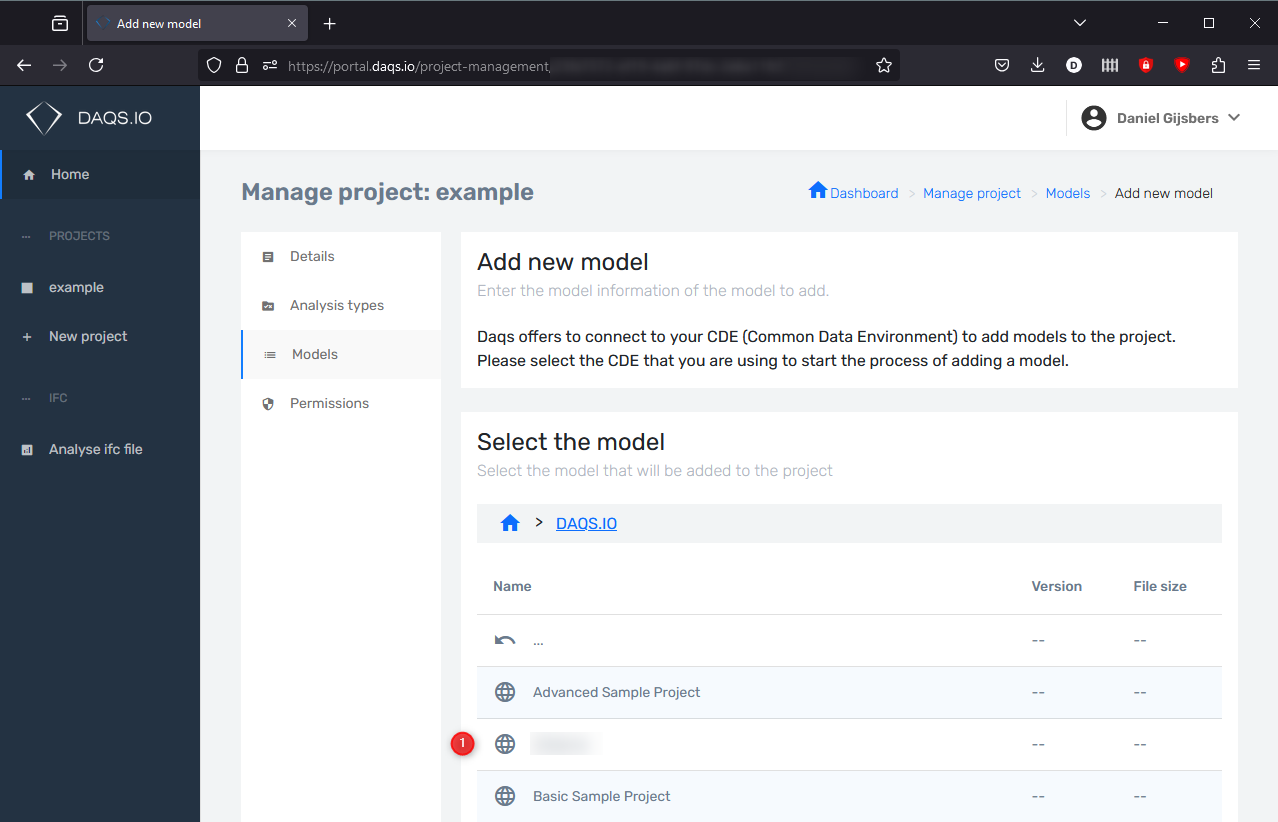
- Select the project.
- Browse to where the Revit models are located that you want to analyse and select the model.
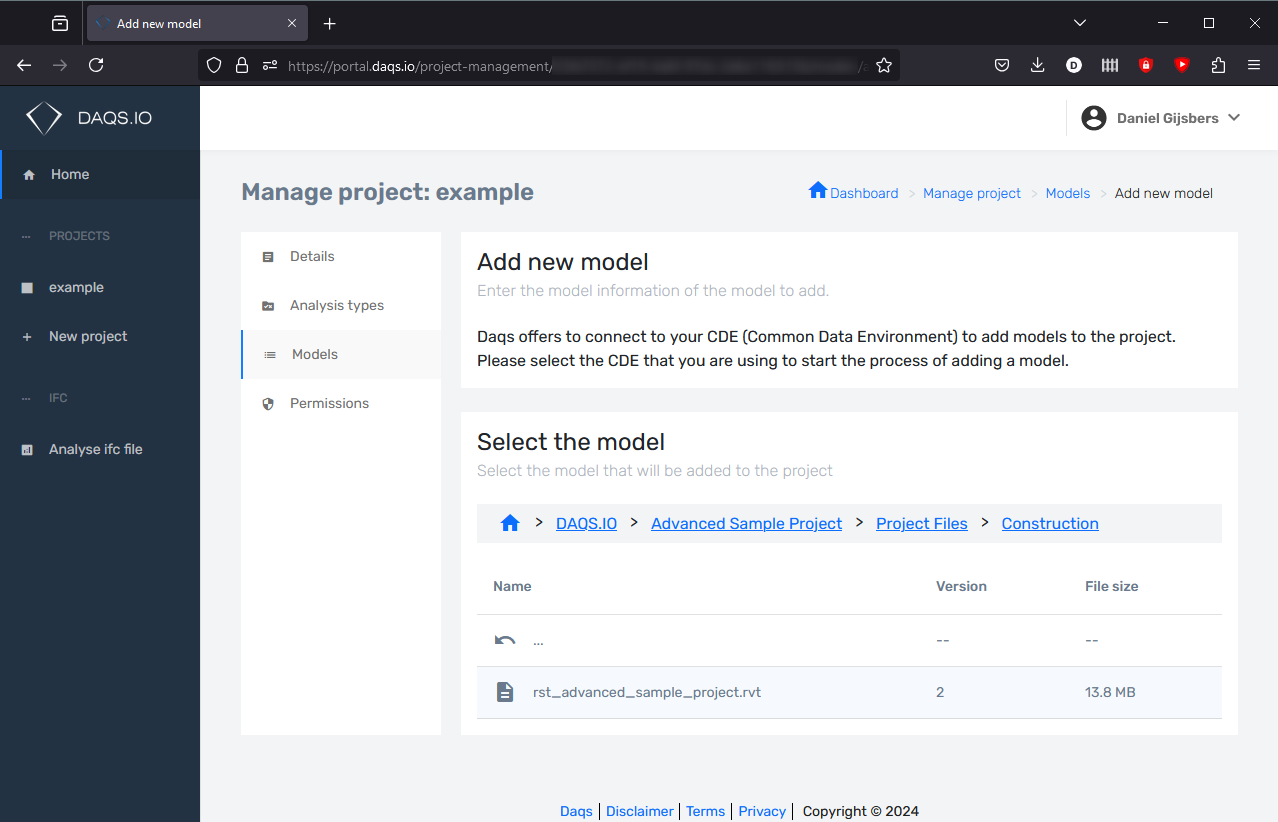
!!! info Explanation Adding a Revit file.
- DAQS does not get your Revit file!
- DAQS does not have direct access to your Revit file!
- Instead, the model's GUID is used to communicate with Autodesk Forge (APS) servers. The Revit file itself always remains securely within Autodesk's ecosystem. DAQS only extracts a specific subset of data from the model to perform validations. This extracted data cannot be used to reverse-engineer the original model, ensuring your design's integrity and security. For the system to work DAQS needs the Autodesk project GUID and the Revit model GUID. This is needed to know which data extraction belongs where on the DAQS dashboard.
- Select a discipline, for the trial please select Architect and click on Add and submit on the next screen.
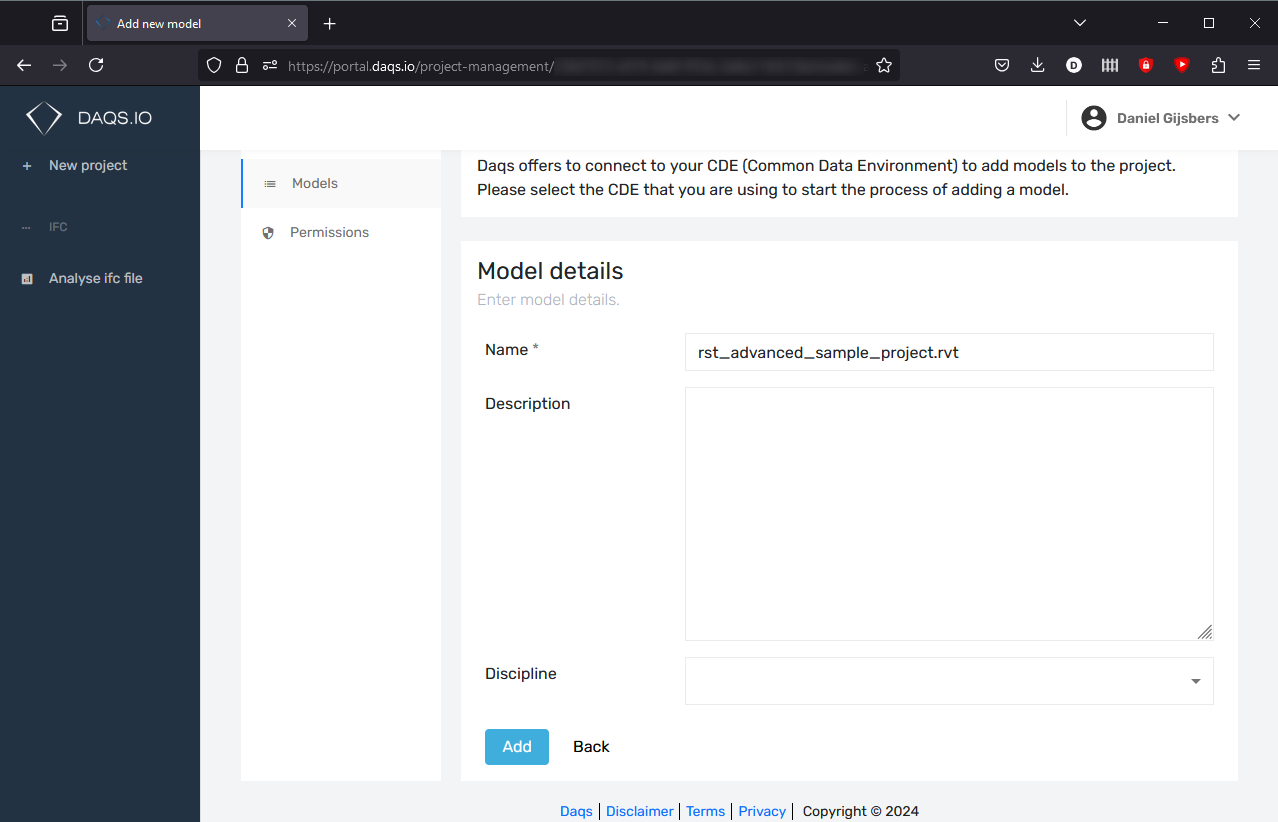
- Repeat for the other models that you want to add.
If you have questions please:
- Call us
- Email us
- Use the form reach out to us